Blogs
|
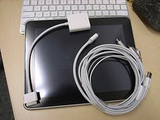
I tried to find a list of iPad apps that will allow projecting via the VGA/composite/component cables and could not find one. I decided to use the power of the crowd to compile a list of the ones that work this way.
Here is the direct link to the spreadsheet with the compiled data.
Here is the link to the form to fill out once you have checked to see if the one you know about still needs to be added to the list! Thanks for contributing!
(Photo credit)
Visit Kathy's Web pages:
Kathy Schrock's Home Page
Kathy Schrock's Guide for Educators
Kathy Schrock
.
Blog
.
<span class='date ' tip=''><i class='icon-time'></i> Aug 05, 2015 06:24am</span>
|
|
Well, I had heard a lot of talk about the power of the GoodReader app for the iPad and I finally had some time to spend with it. I am currently using the newest version 2.7.7.
It is a very powerful piece of software! Created by Good.iware, GoodReader is available for the iPhone, the iPod Touch, and the iPad. Some of the add-on features cost money if you are using it on the iPhone or Touch, but the iPad version includes all of the features for no cost.
Okay, GoodReader is a great PDF file reader. However, it can also read Word, Excel, and PowerPoint files. It can hook to MobileMe, DropBox, box.net, and other WebDAV servers. It can interface with iMap and POP email servers and FTP servers. You can move files up and down with it to and from all these places. You can connect to your Google Apps and Google Apps for Ed documents for easy access and transfer of documents, too.
You can download Web pages through Safari for offline reading. You can download and play videos and audio files. It will reformat a PDF file as plain text for easier reading if you need it to.
There are several ways to get files to and from the computer to the GoodReader app and vice versa; there is a wireless transfer option, connection to online file storage sites and email attachments, and more. (There used to be a way to move files back and forth via a USB connection between the device running GoodReader and the computer, but that was removed at Apple's request a few versions back.)
GoodReader does so much, you will probably find yourself using it all of the time! It truly is the one of the best $.99 purchases you will ever make for your iPad!
Useful links to learn more
User manual
Review: Business Week
Review: Macworld
Video overview
GoodReader's Facebook page
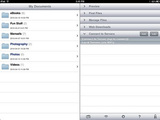
I used Safari to download the main page of the user manual from GoodReader's site to my iPad. The only question I have is why the manual is not available as a PDF download for this great PDF reader!
Photo courtesy of ChrisDag via Creative Commons licensing.
Visit Kathy's Web pages:
Kathy Schrock's Home Page
Kathy Schrock's Guide for Educators
Kathy Schrock
.
Blog
.
<span class='date ' tip=''><i class='icon-time'></i> Aug 05, 2015 06:24am</span>
|
|
Tweeting Meetings
I once tweeted an entire Steve Jobs press conference, 140 characters at a time, for over an hour to all of my followers. Oops! Did I stop to think that everyone might not be interested in the topic. Nope. Did I stop to think that some people get their tweets on their cell phones via SMS and I was sending them tons of text messages? Nope.
Well, many of my followers dropped me a tweet and let me know that my constant tweeting was a problem that day. I thought about a way to solve the problem and still give those that WANT to receive the tweets the option to do so. Here is my solution.
I set up another Twitter account (schrock_bkchan) for tweeting meetings and conferences. I call it my Schrock Backchannel account.
When I am going to be tweeting a meeting or conference sessions, I tweet in my regular "kathyschrock" Twitter account that I will be doing so, and also include the link to the schrock_bkchan account in the tweet.
Users can choose to follow the alternate account if they are interested in the topic, and unfollow once the event is over.
Using this method, followers who are not interested in my pithy comments about a conference session do not get overwhelmed with lots of tweets. This is a good way to keep your followers happy! (Hint, hint to many of the educators I follow!)
More...
There are more good practices for Twitter-using educators I would like to share.
Put something in the bio area about being a teacher. I check the bio of everyone who follows me, and I sometimes block those that are not educators. My tweets are pretty much all educational in nature, and intended for a certain audience, and I try to keep the followers that fit that demographic.
If you are going to be using Twitter, do not protect your tweets. Part of being a good Netizen is sharing your expertise with others. Someone may not necessarily want to follow you, but your great comments don't even show up in the Twitter search tool if you don't make your tweets public. (I often find great educators to follow when searching in the Twitter search tool.) Keep another Twitter account for personal stuff, and protect only those tweets.
Don't feel upset if someone you follow is not following you. I have lots and lots of followers (thank you very much!), but I only follow about 160. No one can possibly follow 6000+ people and get anything else done! I know you cannot DM me if I do not follow you, and I apologize. But I check all the @responses and will respond back to you in a timely fashion. My Personal Learning Network is small, but good, and I often expand it as I see RT of those that I do not follow yet in a post by someone I follow. (Using Twitter effectively does take some practice!)
Twitter is a wonderful professional collaboration and learning tool. Don't forget to be cognizant of your followers, identify what you do, add to the Twitterverse with your open tweets, and create a well-honed PLN!
Visit Kathy's Web pages:
Kathy Schrock's Home Page
Kathy Schrock's Guide for Educators
Kathy Schrock
.
Blog
.
<span class='date ' tip=''><i class='icon-time'></i> Aug 05, 2015 06:24am</span>
|
|
I have not published a post in a while but have not been avoiding technology! This post is simply to talk about some of my recent thoughts and discoveries.
ISTE10 was a blast! I find the ad-hoc conversations with educators in queues waiting for sessions to open, in restaurants, and on the floor while resting and planning the next session to attend, were probably the most important for me. I was able to ask questions and share my thoughts with everyone from classroom teachers just starting their technology journey, to the respected keynotes like Bernie Dodge, Dave Warlick, and Hall Davidson. I love to talk (no surprise there!) and learned so much from these conversations and questions with ed-tech colleagues.
The Apple iPad is still highest on my list of useful technology tools! Although I have the new iPhone 4 now, and love the new iOS4 with the ability to put apps into folders, I know this same capability will be coming to the iPad in a few months, and will make the iPad even that much better. There were hundreds of iPads at ISTE10, everyone shared their favorite apps for support of teaching and learning, and that sharing was invaluable! I have been carrying the iPad everywhere, and with the 3G version, I can be very productive. The only real sticking point for me is trying to use the desktop version of Google Docs on the iPad. It still lacks some key things, like the ability to scroll and the ability to create a share to a document. I am hoping a future update to Google Docs will allow these functions to be usable on the iPad. The mobile version of Google Docs works great for most things, but I need the desktop version to administer the domain and complete some other tasks. However, as more and more apps are developed or redesigned to take advantage of the iPad's larger screen, it is definitely becoming a laptop replacement for me.
I have also been spending quality time with my new iPhone4. The resolution is beautiful and the real-time videoconferencing app, Facetime, is really a lot of fun to work with and I can see its potential power to support teaching and learning. I will be taking a look at some of the Android phones for classroom use (without the cell service) and comparing them to the iPod Touch and the iPad. The Touch is rumored to be having a refresh in the fall, with a camera, Facetime, and some other updates. Time will tell what will be the best 1-to-1 device for students for information access and some creation ability, too.
What are your recent technology discoveries? Please share!
Photo credit:
Andrea Wiggins http://www.flickr.com/photos/anikarenina/2402252323/
Visit Kathy's Web pages:
Kathy Schrock's Home Page
Kathy Schrock's Guide for Educators
Kathy Schrock
.
Blog
.
<span class='date ' tip=''><i class='icon-time'></i> Aug 05, 2015 06:23am</span>
|
|
Magic Trackpad
I received my Apple Magic Trackpad yesterday and have been putting it through its paces.
For the past 5 years, I have most often used a trackball on my desktops at home and at school. The ergonomic aspect of keeping my hand in one place seemed to protect me from the stress and strain oftentimes brought on by mouse use. The Magic Trackpad provides that same "hand and arm in one place" option.
I am also a unibody MacBook Pro user and have never used a mouse with any laptop I have owned.
I still continue to watch some teachers struggle with the use of a trackpad and do realize it is an acquired skill that takes a lot of practice. However, I feel it is well worth the time it takes to perfect it! (How else can you use a laptop on your lap?)
The Apple Magic Trackpad includes all of the cool functionality of the trackpads on the Apple laptops. Features can be customized, and include:
Point
Click
Double-click
Right-click
Click and drag
Two-finger scroll
Rotate
Pinch/Zoon
Page back and forward
Switch applications
Installation of the trackpad required a software update, which did not seem to show up until I had paired the device with the desktop. You will probably need to keep your current pointing device available during the set-up process, as I did.
I have found, as with the trackpad on the laptop, your hands have to be rather dry in order to use it smoothly. Use in areas of high humidity, with damper hands, may cause a bit of a problem.
I tweeted about the device yesterday, and received some inquiries as to the suitability of the Magic Trackpad over the use of the mouse for the youngest students. I think the device is a viable option for easy navigation by the PreK to 1 set, who often find the use of a mouse difficult. (A regular trackball works well for this group, too!) Once students realize they can simply tap to place and double-tap to open, I feel the input device will no longer be a barrier for the younger students. Clicking and dragging may take some getting used to, and you should experiment with drag lock for these students. I would also suggest that most of the other functions of the Magic Trackpad be turned off because of the possibility of swiping and zooming by accident.
I tried the Magic Trackpad on the Windows side of Bootcamp, and it connected with no problem. I have not yet installed the Windows drivers (64-bit available, too) Apple offers, but the comparison chart here shows the functionality on the Mac and three flavors of Windows.
All in all, I am really impressed with the Magic Trackpad as an alternative input device!
Visit Kathy's Web pages:
Kathy Schrock's Home Page
Kathy Schrock's Guide for Educators
Kathy Schrock
.
Blog
.
<span class='date ' tip=''><i class='icon-time'></i> Aug 05, 2015 06:23am</span>
|
|
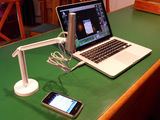
Good things come in small (low-cost) packages! With so many of us trying to demo our smartphones, iPads, or other devices to an audience of educators, the IPEVO Point 2 View ($69) is something to consider for your toolbox! It easily connects to a computer to project to a large group using an LCD projector for real-time viewing of the screens of the electronic devices we are trying to show. Of course, you can project anything flat or 3-dimensional, too, when teaching other content areas. Typical examples include documents for whole-class discussion and mark-up, coins for teaching money for the elementary grades, or tiny bugs and shells in science class.
The iPhone screen projected on the laptop via the Point 2 View
The Point 2 View is a USB document camera. You simply install the software (Win or Mac) on your laptop, plug the camera into an available USB port, and you are good to go! The software allows you to change the zoom on the camera, change the exposure if you are in a light or dark situation, set a timer to take a photo, mirror the item you are looking at, and change the camera resolution from 1600x1200 all the way down to 320x240. The camera itself can auto-focus on your object or also lets you focus manually.
Entire iPad screen projected with the Point 2 View
The Point 2 View is used by attaching it to the included weighted, adjustable base. (It also comes with a laptop/LCD screen clip in case you want to use it as a Web cam.) It is 9"x5"x3" and weighs 1.5 pounds (with most of the weight in the base of the holder). Because of this weighted base, however, you can telescope it way out from the base to show an item if you need to. It stays very sturdy and does not shake.
Locating my house in Google Earth using the camera's zoom function.
The Point 2 View can also be used "in the field" since it is powered by the USB port. Students working outside with a laptop or netbook could use it to view items as close as 2" away and take photographs to share with the rest of the class. In addition, it even works as a long distance camera, as you can see by the shot below!
An interior shot in lower light in my house.
The feature I like best is the ease of zooming in on the object being presented using the zoom functionality in the software. I have just included a couple of sample shots below, but imagine the possibilities! Please share some ideas you have for use of the Point 2 View in the comments section!
Using the 1x zoom setting on the Point 2 View
Using the 2.5x zoom setting on the Point 2 View
Follow up (10/27/10): One person asked in the comments if one could capture moving objects with the Point2View. I did not have any amoeba swimming in a Petri dish at home, so I used Adobe Premiere Elements 9 for the Mac to record a video playing on my iPhone using the Point2 View as the capture source. The unedited result follows:
Visit Kathy's Web pages:
Kathy Schrock's Home Page
Kathy Schrock's Guide for Educators
Kathy Schrock
.
Blog
.
<span class='date ' tip=''><i class='icon-time'></i> Aug 05, 2015 06:23am</span>
|
|
I get lots of email asking why I am taking (and posting) a picture of a door every day. This phenomenon started in 2004 and has morphed into an international project entitled Project365. The original goal was to document each day of a year of your life in photos for reflection on the passing time. I am not sure where the actual official Project365 page is located, but this may be it!
There are many different flavors of this project. Some people participate in Project365 groups that assign them a type of photo to take each day ("Take something yellow." "Take something that contains an equilateral triangle." "Take something that makes you feel happy.")
Others of these Project365 groups concentrate on teaching the participants to be more effective photographers by providing photography instruction and methodology in the day's assignment.
Other people, like me, pick a theme and carry it out in photos throughout the year; hence my door project, which you can view below. (For a much better experience, link to the full MobileMe gallery here.)
Here are some links to places you can find postings of Project365 photos. (BTW, I am not responsible for any content that you see that might be inappropriate!)
Flickr group: Project365-2010
Flickr group: Project 365- The things we see
Twitter hashtag: #project365
Anyone else participating in a Project365 group? Feel free to share your URL in a comment!
Visit Kathy's Web pages:
Kathy Schrock's Home Page
Kathy Schrock's Guide for Educators
Kathy Schrock
.
Blog
.
<span class='date ' tip=''><i class='icon-time'></i> Aug 05, 2015 06:23am</span>
|
|
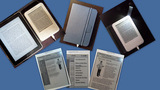
Kindle 3 shots
My first impression of the Kindle 3 is wow! As an early adopter and heavy user of both the Kindle 1 and 2, I am really impressed with the updates!
The device is smaller (7.5" x 4 7/8"). The device is light (weighed it on my postal scale: 8.3 oz.) The page turns are as quick as lightning! The screen is more readable.
You can highlight a passage from anything you are reading and share it via Twitter or Facebook.
In the collage above you will see (click on it to make it larger)...
A photo of the iPad and the Kindle together to demonstrate size.
The new Kindle cover with a built-in light. It weighs almost as much as the Kindle itself (7.8 oz.) which brings the total weight of the Kindle and this case to a tad over 1 pound.
The new case with the built-in light is very well-done, though! You hook the Kindle in the case via two small metal hooks that go into small slots (that must create the circuit) on the left side of the Kindle. Then you simply pull up the upper right-hand corner of the case and a rigid plastic strip with a bright light comes out, and turns on to light up the Kindle screen. The light gets its power from the Kindle, so I will have to do some testing to see what the battery drain is like when using the light. But it works great in the dark!
The experimental Web browser now shows Web pages in their native form. This is the shot of my Web page when typing in the URL.
The pop-up menu for the experimental browser allows you to zoom in on the page to make it readable, bookmark the page, or access your previously bookmarked pages.
This pop-up menu even has an "article mode" which reformats the Web page for easy reading as seen in the last image.
The changes are all good on the new Kindle, and, if you have been holding off, I think this is the time to get one! Of course, you should compare all the other models on the market, too, but I am partial to the Kindle because of the large digital library of choices and the fact that the electronic ink and non-backlit screen allows me to read for a long time without tiring out my eyes!
Anybody else get the new model? Please leave your comments below and share your thoughts!
Visit Kathy's Web pages:
Kathy Schrock's Home Page
Kathy Schrock's Guide for Educators
Kathy Schrock
.
Blog
.
<span class='date ' tip=''><i class='icon-time'></i> Aug 05, 2015 06:23am</span>
|
|
Tammy Worcester recently posted about Blogger's new "post summary" feature. It allows you to just show a small part of a post on your Blogger page, with a link to a "read more" link to allow users to see the rest. The toolbar now includes a "jump break" button you insert in the text where you want the "read more" break to be.
I am not sure that I will use this function much, since I am not sure that I like to read blogs this way, but it will make it easy to scan a blog page if you are not aggregating it already in a newsreader.
If you do decide to use this function, remember to post the important information at the beginning so users WANT to click on the "read more" link! We should remember to teach students the skill of "hook 'em at the start" if they are using this new feature. Another good way to use this feature is to provide an abstract before the "jump break" and then include the full text after the break.
Visit Kathy's Web pages:
Kathy Schrock's Home Page
Kathy Schrock's Guide for Educators
Kathy Schrock
.
Blog
.
<span class='date ' tip=''><i class='icon-time'></i> Aug 05, 2015 06:23am</span>
|
|
Today the entire middle school went to the auditorium to watch the live, streamed back-to-school speech given by President Obama. An interesting phenomenon occurred.
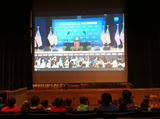
As you can see by the photo below, for the quarter-hour before the speech, the stream was live from a school auditorium in Philadelphia. The camera in that auditorium was situated behind the first couple of rows of students, so, without anything else on the stage at that point, there was nothing to do but watch the students in the audience. They were talking, pointing, using their cell phones to take photos, and just acting like "regular" kids. The students sitting near me asked me why those students could have cell phones in school (since they could not) and mentioned how, with the students on the screen and with our audience flowing down to the screen, it looked like we were there in person, too!
The interesting thing occurred as President Obama was introduced. The students in the auditorium in Philadelphia stood up and clapped and cheered, and the students in our auditorium did the same! When President Obama introduced the special guests in his audience, our group of 500+ students clapped right along with the audience on the screen.
It was mind-boggling to me that the students truly felt as if they were participating in the event in Philadelphia. They acted like they were there. The virtual video stream, to them, was not even evident, and they were an attentive audience, on their best behavior, as if they were present at the event in person.
I know the camera angle before the event helped make the students feel as if they were there in person. Someone at the White House gave some thought to how the event would appear to the virtual connections, and did a great job at making us all feel as if we were there!
I have to give this some more thought, but it truly was amazing to me to see the students so engaged in a virtual event. (And the speech was great, too!)
Visit Kathy's Web pages:
Kathy Schrock's Home Page
Kathy Schrock's Guide for Educators
Kathy Schrock
.
Blog
.
<span class='date ' tip=''><i class='icon-time'></i> Aug 05, 2015 06:22am</span>
|