Blogs
|
I ran to my Best Buy store on Sunday, the day the Best Buy was slated to start selling the Pebble Watch. However, due to the holiday the week before, the shipping schedule was off and there were none yet in the store. However, the Best Buy employee assured me he would call me when they came in, and he did, and I was able to get one (of the two!) that arrived.It is definitely a cool device. However, since there are not a lot of them out on the street yet, it is truly an early-adopter's dream! I had to work hard to learn how it worked and, more importantly, the best ways to make it work for me. The Pebble, for those of you that do not know, is a smartwatch that interfaces with your Android smartphone or iPhone via Bluetooth to provide notifications on your wrist. I would call it a pseudo-smartwatch since you cannot use it to send anything back. You can receive phone call info and SMS messages and you can control the music on your iPhone via the Pebble, set up to four reminder alarms, and, of course, change your clock face at will!The Pebble watch has an e-ink display (like the original Kindles) and can be easily read in the sunlight. There is also a back-light for use in the dark and you can simply shake your wrist to make the light comes on.Here is an unboxing video posted on Sunday from a user who has an Android device, but the set-up on the iPhone is pretty much the same.It does not come with any real directions, probably because it is still a work in progress, but Pebble has information on their site to help you out. If you start searching for ideas, you might get confused between the Android phone owners and the iOS phone owners as to the capabilities of the watch. The new iPhone iOS 7 is going to allow notifications from third-party apps and to devices via Bluetooth which will be a boon for the iPhone/Pebble-owners crowd.Here is the link to the user guide from the Pebble site: http://help.getpebble.com/customer/portal/articles/957384-pebble-user-guideI started to use some workarounds with Pushover and IFTTT, which will work for some things, but once I realized, if I only had everything I wanted to be notified about sent to SMS, I could easily receive the updates on the Pebble.Since I already had my Twitter direct messages sent via SMS, I asked Adam Bellow to send me a DM so I could see how that worked. He is too funny!I wanted my iCal appointment reminders to go to my Pebble, but, as the iOS instructions for setting up notifications page states, that functionality is coming soon to the Pebble. However, I knew there had to be a way to make that happen and I searched "sending iCal reminders to SMS" and came up with this great workaround that totally makes sense-- just use the email equivalent of your mobile phone number (mobile phone number followed by @ mobile company designated address) and send the appointment reminder to that email address! Here are the instructions and it worked like a charm!Another tip-- if you cannot get an app or watchface to install from your phone app, use the desktop, go to the site, download the .pbw files to yourself, and install them via the email app on your device. Pick them to open in the Pebble App.Tip #3: You can make a QR code and put it as a watchface in your Pebble and you will always have your contact info ready to share! It needs to be 144x144 pixels.Do you have a Pebble watch yet? Any ideas for use in the classroom?
Visit Kathy's Web pages:
Kathy Schrock's Home Page
Kathy Schrock's Guide to Everything
Kathy Schrock
.
Blog
.
<span class='date ' tip=''><i class='icon-time'></i> Aug 05, 2015 06:07am</span>
|
|
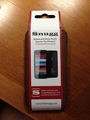
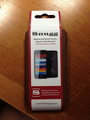
I admit it...I love distressed brown leather. I guess the reason I like it is that it looks better the more it gets used and all banged up. The sign of well-loved distressed leather case is the marks it bears!When Snugg wrote me and asked me to review an item from their site, I was drawn to the Snugg iPhone 5 Distressed Leather Brown Pouch Case for two reasons. The distressed leather material caught my eye, and, even more importantly, this case was an updated version of my favorite iPhone case of all time!I always try to find a tight-fighting pouch case for my phone. A few years ago, Brookstone sold an iPhone 4 pouch case that had a tab on the back to pull up the phone for easily getting it out of the case. However, they have no plans to make one for the larger iPhone 5.I was so excited to see this Snugg iPhone 5 Pouch Case which has the same feature-- a tab on the back (that magnetically sticks to the back of the case) which is attached to an elastic strap to pull out the phone. It also includes a credit card slot on the front that will hold a one or two cards. I made the short video below which demonstrates how well the tab works. This is my dream iPhone 5 slipcase-- distressed leather, thin and tight-fitting, protective, and an easy way to get the iPhone 5 out!The Snugg iPhone 5 Distressed Leather Brown Pouch Case comes in distressed brown leather, black leather and tan suede. It is also available for the iPhone 4 and 4S.
Visit Kathy's Web pages:
Kathy Schrock's Home Page
Kathy Schrock's Guide to Everything
Kathy Schrock
.
Blog
.
<span class='date ' tip=''><i class='icon-time'></i> Aug 05, 2015 06:07am</span>
|
|
Parallels Access screenshotParallels Access is the coolest new program for your iPad and your Mac or Windows computer! It allows you to work with all of the programs that are on your computer on your iPad! Parallels calls it "applifying", since the programs run full screen on the iPad, but also allow you to use tapping, pinching, swiping, and scrolling as if you were using an iPad app! When tapping, the taps are right on, even on the iPad Mini!There is also an application switcher built-in to the interface that allows you to move back and forth among the programs you are using on your PC from your iPad. And, when copying from a desktop app on your iPad, you can paste the text into a native iPad app! The on-screen keyboard shows up when needed if you want to type in the app on the desktop. There is even a drag-and-drop function! On the Mac, I liken it to screen-sharing between two of my computes, but this works between the iPad and my computer!Take a look at a quick screencast I made from the iPad running the Parallels Access Program. 9/1/13: I also had a geek-out session due to a Tweet from @AmandaDoyleTA. I connected my laptop and the iPad via ParallelsAccess, AirPlayed the iPad to my desktop, and was able to record the iPad playing a Flash video from the laptop using Reflector on the desktop. Here is a little clip from the Dante's Inferno (tech version) Flash project.The Parallels Access solution has two components. There is an app you install on your iPad (Parallels Access) and it has a 14-day trial. There is then an agent you install on each of the computers you want to access from the iPad. There is a Mac version and a beta Windows version at this time.You create an account, and connect the iPad app and the desktop. The devices see each other over the Internet, so you will need to leave your computer on (and the agent running) for Parallels Access to work.The Parallels Access subscription cost is for each desktop you want to access, so think carefully about the desktop you want to access. Of course, you can always add additional subscriptions if you want to be able to access multiple computers from the same iPad. Parallels is working on a pricing model for schools and colleges, so watch for that, too!During September 2013, Parallels gave me five year-long subscription licenses for Parallels Access to give away to K-16 educators!Here are some of the ideas that were submitted: I would use Parallels Access to demo our subscription to Questia to our 9th grade students, who are piloting an iPad program for us.Finally! Teachers and students can use Parallels Access to access (!) Flash content on the iPad. This is amazing! I provide Ed Tech and Assistive Technology support to students with disabilities. Typically they require specialized software that does not have an iPad equivalent. I will be using this to provide access to the tools they need to be successful. Have any other thoughts or ideas? Email me or find me on Twitter @kathyschrock
Visit Kathy's Web pages:
Kathy Schrock's Home Page
Kathy Schrock's Guide to Everything
Kathy Schrock
.
Blog
.
<span class='date ' tip=''><i class='icon-time'></i> Aug 05, 2015 06:07am</span>
|
|
I have only been a Mac user for about twelve years, so did not "grow up" with Apple computers as many of you did. I am still making discoveries about the operating system every day!I have been spending some time with Preview (I am using OS 10.8.5) and have learned many of the cool things it can do! The first thing to know is that the Preview.app is located in your Applications folder. It is worth the effort to add it to your dock so it is always there when you need it! PDF documents and PreviewAnnotating PDFsIf you open a PDF document in Preview, you can annotate it in several ways and can use any color you wish! Go to Tools-Annotate to see the menu.Text can be highlighted with a highlighter that always stays on the line!You can easily underline and strike out full lines of text.Rectangle, oval, line, or arrow shapes can be added, re-sized, and easily moved around. Their line-weight and line-type can be modified, too, as well as being able to fill the shapes with a color.You can add speech (smooth) and thought (cloud-like) bubbles and type notes inside of them as well as adding plain text to the document.A sticky note with text can be "posted" on the PDF document.Tools-Annotate A suggestion from William Baker (@MrWilBaker) for a classroom use of one of the annotation features is to use the filled shapes to blank out student names from a PDF document you are sharing or posting.Carole (@ReginaReadsPA) tweeted to me that she uses the text annotation tool to add citations to images and documents. This is a great idea for attribution for Creative Commons-licensed images! One of the most useful annotation tools is the signature. How many times have you been asked to sign a PDF document and return it? If you have Adobe Acrobat, of course, you can use a special digital signature in lieu of a handwritten one. However, to use your own, handwritten signature, the process is easy with the Preview application!First, you have to create your signature. (You have to do this once on each computer you use.) Open Preview and go to Preferences, click Signatures, and pick the + sign to make your signature. A Signature Capture window shows up. You are instructed to sign your name in black ink (the thicker, the better) on a piece of white paper and hold it up in front of the camera on the Mac. You will see the signature on the screen, and, when you click Accept, Preview will save it. When you want to use it to sign a PDF you are viewing in Preview, simply go to Annotate-Signature, and the handwritten signature will show up on the document for you to place and re-size. Other PDF tips If you want to save the PDF document you are viewing in Preview to iCloud, simply pick File-Move To and pick iCloud. You will be able to view these PDF documents from your iCloud on other computers, but not via the iPad. Another neat feature of Preview is, if you are using Safari 6 or better, when a PDF opens in the browser window, you can place your cursor towards the middle bottom of the document and a pop-up will appear that allows you to open the PDF document directly in Preview. (This only works if you do not have any other PDF reader set-up to open PDFs.)When you have a PDF document open in Preview, you can open the View-Thumbnails menu item and rearrange the order of the pages in your document and then save the rearranged copy! John Larkin (@john_larkin) told me you can merge PDF documents in Preview, too. I figured out how to do that. Open both PDF documents in Preview and choose to View-Thumbnails. Once you can see the thumbnails, simply pick the pages you want to merge from one document and drag them on top of the thumbnail area of the other document. (Don't put them at the end of the other thumbnails, just drag them on top.) Move the thumbnails around in the merged document if you need to and save it! Images and Preview The Preview application also has image editing capabilities, too. Here are some of them...Screen CapturesScreen-captures are easily created with Preview. Open Preview and go to File-Take Screen Shot. There will be three options-- From Selection, From Window, From Entire Screen. Many of us use the key commands (CMD+SHIFT+4, etc.) to take our screenshots but this is another way. However, Preview has one neat feature that can help you out. When you pick the From Entire Screen option, Preview provides you with a 10-second countdown which gives you time to move things around on your screen before the screenshot is taken. This is helpful, at least for me, since I often wind up with things in the screenshot that I do not want there! In addition, if you hold the CTRL key down while taking a screenshot from within Preview, the image will be put on your clipboard to easily paste somewhere else. Editing imagesYou can crop images when they are open in Preview by picking Tools-Rectangular Selection which gives you the crosshairs to highlight the area you want, and then you simply pick Tools-Crop and save the edited image!There are also additional options available for editing images. If you open an image in Preview and View-Show Edit Toolbar the options appear right on the image, as you can see below. You can add text and shapes, change the color saturation, re-size the image, erase the background, and more. You can also rotate and/or flip the image if necessary.Image editing toolbar in PreviewPreview also allows you to change the file format of an image. Simple open the image in Preview, go to File-Export, and you are presented with the choices of saving the image as a JPEG, JPEG-2000, OpenEXR, PDF, PNG, or TIFF. You can also change the quality of the image to a lesser quality if you need to decrease the file size but want to keep the same dimensions. Viewing images To open multiple photos in Preview at one time, first select the images you want to view. (It is helpful if they are all in one folder!) Then right-click or CNTRL+click and pick Open In-Preview. The images will show up with a navigation bar on the side as you see below. Once items are in Preview, you can highlight multiple images and batch edit them with the image editing tools. (Thanks to @john_larkin for this tip!) Viewing multiple image in PreviewOnce you have the images in Preview, you can also choose to view a slideshow of the images by picking View-Slideshow. If you load a large number of images into Preview, you can also view a contact sheet by going to View-Contact Sheet. This is handy for printing out or viewing many images at once. You can see a sample contact sheet below.Contact sheet as viewed in PreviewCustomizing PreviewOnce you become familiar with some of these tools in Preview, you may want to add or subtract items from the default Preview toolbar. Once an image or PDF is open in Preview, just go to View-Customize Toolbar and you will be presented with the choices below. You can remove or add items by dragging, rearrange icons on the toolbar, and decide if you want icons, text, or both to show up. (I like to keep text on until I become familiar with the icons.)Customizing the Preview ToolbarDo you have other Preview tips to share? Do you have special ways you use Preview in the classroom? Email me or find my on Twitter @kathyschrock
Visit Kathy's Web pages:
Kathy Schrock's Home Page
Kathy Schrock's Guide to Everything
Kathy Schrock
.
Blog
.
<span class='date ' tip=''><i class='icon-time'></i> Aug 05, 2015 06:07am</span>
|
|
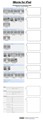
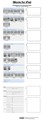
This post originally appeared in September of 2013 on my Discovery Educator Network blog, Kathy's Katch, where I pen a monthly blog post. Please take a look at it when you get a a chance. The new posts go up the first day of the month!I have finally had time to work with iMovie movie trailers on the iPad, and it is so much fun! A movie trailer is a perfect summarizing activity. It can also act as a "teaser" as an introduction to a presentation or student paper. A movie trailer can readily showcase the acquisition of knowledge of a lesson or unit. A movie trailer includes many of the literacy areas. There is a component of information literacy as students search for and gather assets to include in the trailer. There are reading and writing skills (traditional literacy) as students write out their ideas and scripts. There are elements of media literacy as students identify their audience, use words to persuade viewers, and maybe transfer another mode of publishing (like a research paper) into a video. Visual literacy comes into play with the choice of colors and font. The movie trailer component of the iMovie app for the iPad includes several themes to pick from. The transitions and animations are already built-in, but students can do some editing of these themes to showcase their work in a different way. The first step in making an iMovie movie trailer is taking a look at the script and storyboard pages. It is a good idea for students to spend some time thinking about the theme of the trailer they want to use and start gathering the pictures and videos to use in the production. One great site by Timothy Jefferson includes PDFs of all of the theme scripts so students can work things out on paper first, as they are going through the development process. Here is a sample of one of the PDFs. Some ideas for using movie trailers across the curriculum include:Have students create an "end of course or class" trailer to introduce others to the courseStudents can create an advertisement for a product they created in a STEM class.Movie trailers can put a new spin on the "all about me" presentation.Students can help create promo pieces for upcoming school events, class elections, and fund-raising activitiesA movie trailer can be a very short, but exciting digital story, summarizing the content and/or process in any curriculum areaRoz Linder's ideas for using movie trailers as a way to introduce different viewpointsFilmeducation.org's great resource about the use of film trailers in the classroomMr. Manion's Movie Trailer Analysis which could easily be turned into a rubricYou can also find many tutorials which include instructions on the process of using iMovie movie trailers on the iPad From MacLife (written)From Make Use Of (written)From Pasco Schools (video)From Jim Gates (video)Discovery Education Streaming, with its editable videos and hundreds of images, is a wonderful set of resources to use in iMovie movie trailers. I decided to utilize DES to make an iMovie movie trailer and only use the iPad. I logged in to Discovery Education Streaming, did three searches (tornado, storm, lightning) and limited the search to images. I added the images to My Content. When I had collected enough (with three personal ones also), I opened each one and "saved to library" which then put all the images into my Photos app Camera Roll. I picked the Scary trailer theme, entered the credits information, and added the images to the storyboard, as you see below. I adjusted some of the Ken Burns transitions to highlight the important parts of the photos. I then simply sent the completed movie trailer up to YouTube! Give iMovie movie trailers a try today! Do you have some ideas for the use of iMovie Trailers across the content areas? Email me or find me on Twitter @kathyschrock
Visit Kathy's Web pages:
Kathy Schrock's Home Page
Kathy Schrock's Guide to Everything
Kathy Schrock
.
Blog
.
<span class='date ' tip=''><i class='icon-time'></i> Aug 05, 2015 06:07am</span>
|
|
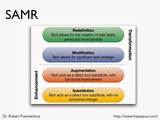
I have been asked to elaborate on my understanding of the SAMR model, a model written about extensively by Dr. Ruben Puentedura. This model suggests a structure for the design of embedded technology use in the classroom to have a significant impact on student outcomes.My feeling is this model supports teachers as they design, develop, and integrate digital learning experiences that utilize technology to transform learning experiences. Along the continuum, the student engagement becomes more of the focus and students are then able to advance their own learning in a transformational manner.Puentedura's visual of the SAMR model is self-explanatory, as seen below. I decided to take the typical classroom process of note taking to demonstrate my thoughts for how the SAMR model might look in a classroom.SUBSTITUTION LEVEL Note taking is traditionally done with paper and pen/pencil.At the substitution level, you first have to think about what will be gained by the use of technology for the task. You want to make sure you are not advocating technology use just for technology's sake.In the case of note taking, however, the benefit of having notes in a digital format for ease of sharing and uploading, and providing access to them anywhere, any time, is a useful substitution activity. At this level, the technology substitution, with no real change in student engagement, would be the use of a stand-alone or cloud-based word processing program.AUGMENTATION LEVEL At the augmentation level, there again is a direct tool substitute, but there is some improvement in student outcomes. At this level, one of the benefits is teachers can receive almost immediate feedback on student level of understanding of material and students can also learn from others.One way this can occur is by the use of a backchannel tool (such as Today's Meet or Padlet) for whole-class note taking. The augmentation level starts to move along the teacher/student-centric continuum. The impact of this immediate feedback and collaboration is that students should begin to become more engaged in the learning process.MODIFICATION LEVEL Modification allows for a change in the task redesign. Students can be asked to take notes using a screencasting tool and then later go back and add the audio component and post these online for their peers and anyone else who wants to see them. Because they are working for an public audience with this task, each student has a personal stake in their note taking.http://screencast-o-matic.com/channels/clj6hlnqUAnother modification option for note taking using technology would have students creating mind maps or concept maps as they take notes. Again, these can be easily shared. A collaborative version of this mapping could be implemented as groups of students take notes on certain aspects of the lecture, presentation, reading, etc. and then pull all the maps together to complete the picture. (I call this the "Ancestry.com" model!)https://library.usu.edu/instruct/tutorials/cm/Samples_files/cm.gifREDEFINITIONWith redefinition, the emphasis is on student-centered learning. The student learns new skills and concepts as they complete the task. Sketchnoting, or visual note taking, is a way for students to practice listening as well as planning an organizational strategy for taking notes. There are drawing and note-taking apps for all platforms available for sketchnoting. (A lot more about sketchnoting can be found here.) A redefined task would be for students to sketchnote, share online, and provide answers to questions about the content included in the public venue.http://networkedmedicine.tumblr.com/post/43788097011/sketchnote-that-i-drew-reflecting-class-discussionMAPPING BLOOM'S AND SAMRBelow is a visual of my initial thoughts on the relationship between Bloom’s and the SAMR model. I feel teachers need to both create tasks that target the higher-order cognitive skills (Bloom's) as well as design tasks that have a significant impact on student outcomes (SAMR). It's as simple as that. Educators will argue that they have seen redefinition tasks that only target the remembering level or have a creative assessment that is only at the augmentation level. Of course that is true, but I believe we should be planning for technology tasks, activities, and assessments that include both the higher levels of Bloom's Revised Taxonomy and the transformation area of SAMR model.I have created a page of SAMR resources if you want to learn more and come to your own conclusions about how it might be implemented in your classroom. Comments? Thoughts? Email me or find me on Twitter @kathyschrock
Visit Kathy's Web pages:
Kathy Schrock's Home Page
Kathy Schrock's Guide to Everything
Kathy Schrock
.
Blog
.
<span class='date ' tip=''><i class='icon-time'></i> Aug 05, 2015 06:07am</span>
|
|
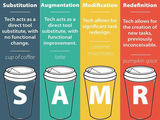
Since this blog IS the Kaffeeklatsch, I thought I should share some of the ways people have been using coffee analogies to explain the SAMR model. I cannot vouch for the analogies, but thought it was interesting this seems to be a common practice!The SAMR ModelThe image below was created by Jonathan Brubaker and appeared in a blog post here.SAMR Model and Starbuck's CoffeeSAMR vs. LatteEmail me with any other coffee analogies you find in the education arena!
Visit Kathy's Web pages:
Kathy Schrock's Home Page
Kathy Schrock's Guide to Everything
Kathy Schrock
.
Blog
.
<span class='date ' tip=''><i class='icon-time'></i> Aug 05, 2015 06:06am</span>
|
|
First published in the AWSA Update Bulletin, October 16, 2013. Some information has been updated below.OverviewInfographics are everywhere! We see them on the Web and in our professional journals. Students see them on Facebook and on advertiser’s pages. How can the use of infographics be used to address the Common Core State Standards?An infographic is a visual representation of information. It differs from a poster in that it usually includes graphs and charts of information. Not all infographics include data, though. There are quite a few types of infographics, as listed below.Statistical infographic: includes a summation or overview of dataTimeline infographic: shows the progression of information over timeProcess infographics: demonstrate a process, whether linear or branchingInformational infographic: similar to a poster, but with some data includedResearch-based infographic: compares unlike items with a known data setInteractive infographic: a Web-based infographic that allows the user to have control and modify the infographicThere are two basic ways infographics can be used to support teaching and learning. The first is showcasing already-created infographics to support a specific content area. For example, a health class might use an infographic entitled "A Tale of Two Meals" or an English class might use one called "A Literary Map of Manhattan" which includes clickable links to the places in Manhattan where famous literary characters resided.The second way infographics can be incorporated into teaching and learning is by having students create an infographic as a formative or summative assessment. By creating an infographic, students are conducting research and gathering assets to use for their infographics (information literacy) working with color, fonts, and layout to impact their audience (visual literacy), presenting their infographic to persuade, convince, or inform (media literacy), and using technology tools and data visualizations to create the infographic (digital literacy). In addition, of course, they are demonstrating mastery of content knowledge with the content-specific information they include in the infographic.Infographics RubricThe rubric below can be used for both of these purposes. When analyzing infographics, students should pay attention to the topic of the image, the type of infographic and whether it is appropriate to the information display, whether the pictorial elements of the infographic and the data visualizations are understandable, if the color, font, and layout add to the presentation of the infographic, and that bibliographic citations are included to allow access to the original source of the information. When creating their own infographic, students need to consider all of these same items while, at the same time, considering the purpose and audience for their infographic.http://www.schrockguide.net/uploads/3/9/2/2/392267/schrock_infographic_rubric.pdfCommon Core State Standards and InfographicsThe Common Core State Standards do not specifically mention "infographics", but there are many standards, both content-based and literacy-based, that can be addressed with both the analysis or creation of infographics by students. Here are a few from both the CCSS ELA Standards and the Standards for Mathematical Practice.ELA Common Core StandardsCCSS.ELA-Literacy.CCRA.R.7 Integrate and evaluate content presented in diverse media and formats, including visually and quantitatively, as well as in words.CCSS.ELA-Literacy.CCRA.W.8 Gather relevant information from multiple print and digital sources, assess the credibility and accuracy of each source, and integrate the information while avoiding plagiarism.CCSS.ELA-Literacy.CCRA.SL.5 Make strategic use of digital media and visual displays of data to express information and enhance understanding of presentations.CCSS.ELA-Literacy.RH.6-8.7 Integrate visual information (e.g., in charts, graphs, photographs, videos, or maps) with other information in print and digital texts.CCSS.ELA-Literacy.RH.9-10.7 Integrate quantitative or technical analysis (e.g., charts, research data) with qualitative analysis in print or digital text.CCSS.ELA-Literacy.RST.6-8.7 Integrate quantitative or technical information expressed in words in a text with a version of that information expressed visually (e.g., in a flowchart, diagram, model, graph, or table).CCSS.ELA-Literacy.RST.9-10.7 Translate quantitative or technical information expressed in words in a text into visual form (e.g., a table or chart) and translate information expressed visually or mathematically (e.g., in an equation) into words.Standards for Mathematical Practice K-12Represent a mathematical situation with symbolsUse objects, drawings, & diagrams to create an argumentMap relationships using tools such as diagrams, two-way tables, graphs, flowchartsFind digital content and use it to solve problems and use technological software and tools to do soGraph data and search for regularity and trends Creation of InfographicsInfographics can be created with any software program that allows layer-based image editing, which simply means images and text can be placed on top of other images. There are commercial packages, such as Adobe Photoshop Elements as well as online and downloadable tools that allow this layer-based editing. Some of these include:• Google Drawings (https://support.google.com/drive/answer/177123?hl=en)• Pixlr (http://pixlr.com)• Inkscape (http://inkscape.org/)• Sumo Paint (http://sumo.fm/#create)• Sketchpad (http://mudcu.be/sketchpad/)In addition, presentation programs such as Microsoft's PowerPoint, Apple’s Keynote program, and Google Slides allow layers of images and text on a slide, so these tools can also be used for student creation of an infographic. There is also an iPad and Android tablet app that helps students create infographics on their mobile devices called iVisual Info Touch Light (iOS) and iVisual Touch Free (Android). The full-version of the app allows students to bring in their own images and other features. (Added 1/27/15: And there is a great iOS app that includes many publishing formats, and includes infographic creation, called Canva.There are interactive, online tools available that are meant specifically for the creation of infographics. Each tool includes templates to edit and the ability to add data or graphs to the template. Students need to have email accounts to sign-up to use these tools. Some of the online tools include: Picktochart (https://magic.piktochart.com/) Easel.ly (http://easel.ly) Infogram (http://infogr.am)Canva (http://canva.com) (added 1/27/15)Visme (http://visme.co) added 1/27/15)Venngage (http://venngage.com) added 5/29/15) Introducing Infographics to StudentsWhen introducing infographics to students, teachers should first showcase what data visualizations look like. A great site for students to become familiar with the different types of data visualizations is the Periodic Table of Data Visualizations (http://www.visual-literacy.org/periodic_table/periodic_table.html). When students have collected their data, they can then use Chart Chooser (http://labs.juiceanalytics.com/chartchooser/index.html) to determine how best to present their data.Students should study the infographic rubric and then, in small groups, evaluate infographics on the Web or in print. By looking at infographics with a critical eye, they will gain some insights on to how best to create their own infographic.SummaryThe use of infographics in support of teaching and learning is a natural fit. Students practice with many types of 21st century literacies. The completed infographic projects meet many of the Common Core State Standards. And students learn the important skills of meeting the needs and interest level of their intended audience by choosing the right type of data visualization. You can find more information and links to resources here: http://linkyy.com/infographics
Visit Kathy's Web pages:
Kathy Schrock's Home Page
Kathy Schrock's Guide to Everything
Kathy Schrock
.
Blog
.
<span class='date ' tip=''><i class='icon-time'></i> Aug 05, 2015 06:06am</span>
|
|
Screenmailer is a new screencasting/screen recording tool for Mavericks on the Mac. It is easy to use, quick to render, and can be used as an on-the-spot solution for teacher or student screencasts!As with any screencast, you should first plan your recording, get things set-up on your desktop, practice your script, and then start the recording. Setting up the screencastScreenmailer runs on your Mac, and, once installed, allows you to log-in with Google credentials or create a Screenmailer account. You will need to be connected to the Web in order to use Screenmailer.Once logged inSign in or create an accoutOnce you log-in, as you seen above, you can see your previously-recorded videos, play them, delete them, email the link to someone, or copy the link. And, of course, you can begin a new recording by picking the record button. You then get a choice of the audio input source and whether to record the full screen or to outline an area of the screen to record. The developer of Screenmailer recommends outlining an area rather than using the full screen option, especially if you have a hi-res screen. You can record a video for up to 30 minutes and easily pause the recording to collect your thoughts or change what is on your computer screen. This comes in handy when showcasing different content during the screen recording. Also, you can see you can easily record yourself (or any other video) at the same time you are showcasing content.The screencast is saved to the Screenmailer server, and you are provided with a private URL for sharing your video and you can email the link to students or colleagues. Any video you record and post will appear whenever you log-in to your accout, so you always have access to the private URL and can delete a video if you no longer need it. Here is the latest test video I recorded. (One tip: if you are planning to show a video during a class period, load and play it beforehand so it is buffered on your computer.)One option that should be coming soon to Screenmailer is the ability to download the video either in the app or on the video play page. Until that happens, you can use the Firefox extension Video DownloadHelper to download the video to your computer for use in a presentation, putting into a content management system, or uploading to your YouTube or Vimeo channels. (Thanks to Tom Gavin for the find!) It has worked for me on my desktop with no special set-up. I suggest you pick .MP4 as the download format so it is compatible with many sites and programs.If you have any ideas or thoughts for the developer of Screenmailer, his contact information is on the Screenmailer home page. He is very receptive to ideas for future features. And follow @screenmailer on Twitter to find out about any new features!If you are going to be creating screencasts for students or having students create their own, I have a blog post dedicated to the idea, Screencasting for Educators, and a Web page, Screencasting in the Classroom, with links to successful practices, resources, and much more. If you create any screencasts for the classroom with Screenmailer, share the URL with me via email. We can all learn new techniques for creating engaging screencasts from each other!
Visit Kathy's Web pages:
Kathy Schrock's Home Page
Kathy Schrock's Guide to Everything
Kathy Schrock
.
Blog
.
<span class='date ' tip=''><i class='icon-time'></i> Aug 05, 2015 06:04am</span>
|
|
I was contacted to have an interview with a CNN reporter about Glass use in the classroom. I knew I could not participate in the interview because of some family events, so I just wrote a lengthy email with my thoughts. The article came out on February 10, 2014, included a a bit of what I wrote about, but I wanted to share the full text of my thoughts.An an educational technologist, a Google Certified Teacher, and in my role of ISTE Board member, I am always thinking about the role technology can play to improve teaching and learning. It is not about the technology, but about having a choice of tools available for students to support their learning. Educators are bringing blended learning and project based learning into the classroom. Students are researching, collaborating, and creating projects and products to showcase their mastery of content by using technology in meaningful ways.Wearable technologies, such as Google Glass, are beginning to be used by teachers and students to support the instructional process. Teachers and students are sharing the ways they find to include Glass seamlessly into the curriculum via blogs, Twitter, and Google+ postings. Even though there may be only one pair of Glass in a classroom, the ability to screencast what the wearer sees and project it via an iOS or Android device, opens the world of Glass to everyone in the room. The ongoing development of applications to be installed on Glass, called Glassware, also provides various tools that can be used in the classroom.Some of the uses of Google Glass in the classroom includeStudents or teachers creating videos through the eyes of the wearer to share with others. These videos can be recorded and shared via YouTube as well as be shown in real-time by starting a Google Hangout.When wearing Glass, the wearer can use both of their hands, and can easily document a science lab, presentation, or other class-related event and post that up to a class Facebook, Tumblr or Google+ account, all via Glass.WordLens is a Glassware app that translates what the viewer is reading to and from many languages. This can be very beneficial to a second language learner in the classroom.For students with physical handicaps, being able to search the Web via their voice as well as easily send messages to a classroom backchannel, Twitter, or the teacher, can assist them with various classroom tasks.For students who are interested in developing applications, Google Glass provides another avenue of developing for a specialized device.The possibilities are endless as more applications are developed for the device and as Glass gets into the hands of more teachers and students. There are many educators in K-12 who are documenting how they are using Glass in the classroom. Educators are always eager to share and help one another!One great project is Margaret Powers (@mpowers3) "365 Days of Glass Project". (http://http://365daysofglass.com/) Each day she documents how she and the students are using Glass in her schools. Recently, she recorded kindergarten students in her Maker Club, as they create flowers out of cups, cardboard, and additional materials. And the next day, after their unit on snow, the kindergarteners wore Glass to record images and videos of the snow outside and share them with classes they are collaborating with in Brazil and Singapore. The first-person perspective on her site becomes instructional for other teachers and makes it easy for them to replicate the lesson or project in their own classroom.Ms. Powers is also spearheading a global collaborative project between her K-2 students and other classes around the world who want to participate in virtual field trips and Google Hangouts to exchange cultural information and learn about other places in the world. These include classroom tours and first-perspective lessons. (http://globalclassroom2013-14.wikispaces.com/The+Global+Google+Glass+Project)An interesting pilot project that should provide teachers and students with more ways that Glass can be used in the classroom is the one at Lufkin Independent School District in Lufkin, Texas. The middle school students are encouraged to wear Glass and come up with ways for it to be used in school. As more schools get Glass in the classroom, there will be widespread sharing of thoughts and ideas.Having a single pair of Google Glass in the classroom reminds me of the days of the one-computer classroom. Everyone had to wait for a turn to use the device. I think once we see a K-12 school pilot with a classroom set of Glass, there will be many more practical and creative uses showcased.Resources for the support of Google Glass in ClassGoogle Glass in Class Resource Pagehttp://www.schrockguide.net/google-glass-in-class.htmlGoogle Glass in Education Google+ Communityhttps://plus.google.com/communities/107609996462187425150What are your thoughts about Google Glass in the classroom for teaching and/or learning? Email me or find me on Twitter @kathychrock
Visit Kathy's Web pages:
Kathy Schrock's Home Page
Kathy Schrock's Guide to Everything
Kathy Schrock
.
Blog
.
<span class='date ' tip=''><i class='icon-time'></i> Aug 05, 2015 06:04am</span>
|